Recently I decided it was time to upgrade my main desktop computer. My current system, featuring an Intel DP55KG motherboard (P55 Chipset/Socket 1156), Intel Core i7-860 (Lynnfield) processor, AMD Radeon HD 5870 GPU, and 8 GB of DDR3-1600 Mushkin RAM, had served me well, but I was anxious to give Intel’s “Sandy Bridge” architecture a try. This post will document my upgrade, starting with the parts I selected and why; the assembly of the system and the challenges I encountered; and finally, a few thoughts on overclocking the upgraded system.
The Parts
As I stated in my previous posts concerning my Lynnfield build, I’ve built a good many PCs over the years. My goal now, as it was then, was to use the best quality components I could find for a low price, and build a good, fast, and reliable machine. In other words, build a machine that’s a good value.
The Case – Thermal management in Intel processors have progressed to the point where unless you’re planning on doing some serious overclocking there’s really no reason to consider using water cooling over a good air cooling solution. Consequently, I was looking for a mid-tower case with good air flow. Since the NZXT Tempest case I used for my Lynnfield build had served me well in this regard, I decided to go with the next generation of this case, the NZXT Tempest Evo. Among other things, this case features dual 120mm intake and 140mm exhaust fans, with an additional side 120mm fan and rear 120mm fan, making it one of the better cases for air cooling. Another nice feature that was added to this case is a slightly wider side panel design, thus increasing the available space behind the motherboard for cable routing, as well as a punchout behind the processor so one doesn’t have to completely remove the motherboard from the case in order to replace the heatsink and fan.
The Power Supply – I’ve almost exclusively used power supplies from two manufacturers: Fortron for lower cost builds and PC Power & Cooling. This time however, I decided to go with the Corsair TX750. This is a slightly less expensive unit than a comparable one from PC Power & Cooling, but Corsair does maintain quality products and this unit still features a dedicated, single +12V rail for maximum and efficient power distribution.
The Processor – With Sandy Bridge Intel launched with no less than 29 different SKUs (15 for mobile and 14 for desktop) once again presenting a very challenging decision for the gamer/enthusiast building a new desktop system. After doing some research and giving it much consideration, I chose the Intel Core i7-2600k processor with a 3.4 GHz core clock, 8 MB of L3 cache and hyper-threading. Besides the featuring the highest core clock among the Sandy Bridge desktop processors, the “K” suffix means the “turbo mode” multipliers, from 16x all the way up to 57x, are fully unlocked, giving this processor a lot of overclocking potential.
The Motherboard – I’ve traditionally used ASUS motherboards but then began to run into reliability problems with them over the years. I also grew tired of the growing list of “features” their boards began to offer that I had no use for on my desktop machines (e.g. WiFi, Bluetooth, etc.), resulting in time spent maintaining drivers for these features or trying to disable them altogether. For my Lynnfield build I used Intel’s DP55KG and really liked it. No it didn’t have all the features and overclocking capabilities of say an ASUS or Gigabyte motherboard at the time, but it turned out to be sufficiently overclockable for my needs and has been 100% reliable. However, The Sandy Bridge processor ushered in yet one more socket change by Intel, Socket 1155, taking the option to use my existing Socket 1156-based Intel DP55KG motherboard off the table. Even so, given my overall good experience with Intel motherboards, I initially decided to go with them again for this build and chose their DP67BG. However, no sooner had this board arrived than Intel announced that they had discovered a design error in the P67 chipset. In some cases, the Serial-ATA (SATA) ports within the chipset may degrade over time, potentially impacting the performance or functionality of SATA-linked devices such as hard disk drives and DVD-drives. Since I had just purchased the product I returned it as defective for a full refund. Then I waited for Intel to roll out the next (so called “B3”) version of this board. Unfortunately that day never came, and Intel showed no sign that they would upate this product, so I once again looked to ASUS to meet my needs and ended up selecting their Sabertooth P67 board, my first I should add that featured a Unified Extensible Firmware Interface (“UEFI”). I also purchased a small 50 mm fan from Evercool to help improve upon the board’s “TUF Thermal Armor” cooling capabilities.
The Heatsink – I chose the Cooler Master Hyper 212 after doing a bit a research to make sure it would clear the surrounding components on the motherboard, including the RAM. To improve its already very good cooling capabilities, I purchased an additional 120 mm fan from Cooler Master that matched the fan the product shipped with and set it up in a push/pull configuration. This fan configuration combined with the NZXT case should provide excellent overall processor cooling. Finally, to ensure that both fans would rotate at reasonably the same speed, I used a PWM splitter from Rosewill to power and control both fans from the processor fan header.
The RAM – I was looking for an 8 GB DDR3-1600 dual kit (2 x 4 GB) with the timings as low as possible. Another factor that I was glad I considered ahead of time was whether the RAM would fit under the processor’s fan/heatsink due to the close proximity of the RAM slots to processor. I ended up eliminated a couple of products (Corsair’s “Dominator” as an example) because they were too tall to fit. I ended up selecting G.Skill’s RipjawsX DDR3-1600 8 GB dual kit, which runs at 1.65v with timings that spec at 7-8-7-24-2N. I had heard and read good things about G.Skill memory and was anxious to finally have the opportunity to give one of their products a try.
The Graphics – I have no particular allegiance to either AMD or Nvidia and was willing to go with a product from either depending on its price versus performance. I ended up going with AMD this time around and chose the MSI R6950 Twin Frozr II OC. For ~$290, I felt it provided the best performance for the money.
The Hard Drives – When I built my Lynnfield-based rig, solid state drive (SSD) prices were still relatively high compared to conventional spindle drives and firmware support for features like “trim” so fluid I decided to stick with with my trusty Western Digital “Raptor” drives. SSD prices have since dropped and trim support is now fully implemented so I decided it was time to upgrade. While I wanted to spring for a new SATA revision 3.0 (SATA 6 Gb/s) drive, I could not justify the cost at this time, so I chose instead the OCZ Vertex 2 80 GB SATA revision 2.0 (SATA 3 Gb/s) SSD. This will serve as my system drive, and a Western Digital Caviar Black 1TB 7200 RPM 64MB cache SATA 3.0 drive will hold my data.
The Optical Drive – Believe it or not I actually still use one of these :). I didn’t spend much time shopping for it though, instead I went to Newegg, navigated to CD/DVD Burners, selected “Best Rating” from among the search options, and dutifully paid for the ASUS DRW-24B1ST.
The Operating System – Not much of a surprise here, I went with Windows 7 Pro 64-bit. Why the Pro version instead of Home Premium? Remote Desktop. Home Premium doesn’t support it and I need this feature so I can access this machine remotely. Why Windows and not Linux? Games. I’m a PC gamer and this is my gaming rig (there are many like it but this one’s mine…). Someday perhaps computer gaming on *nix-based systems will be a viable option. No one hopes that day will will come more than I do, but it’s not today.
The Build
With the component selection and purchase out of the way it was time to put them all together. I like to build systems outside of the the case. Then, when I’m sure everything is running well, I’ll place the components in the case and dress up the wiring (See Figure 1).
The SATA 2.0 and SATA 3.0 ports are mounted horizontally, facing the back of the case, instead of vertically, making it much easier to connect/disconnect disk drives with the graphics card in place. I placed the 80 GB OCZ Vertex 2 drive, which will hold the operating system, on the P67 controller’s SATA 3.0 GB port 1, and the 1TB WD Caviar Black drive on the SATA 3.0 port 2. These are the Brown SATA ports on the ASUS Sabertooth P67 motherboard.
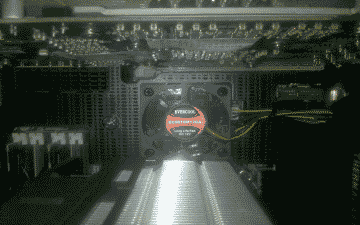
The Sabertooth P67 is equipped with what ASUS calls “TUF Thermal Armor,” a rather fancy term for what is essentially a heatsink that encompasses nearly the entire motherboard. The idea behind this somewhat unorthodox design is to conduct the hot air generated by cards and components out of the case through special air flow channels, thus reducing the overall temperature of the motherboard, and by extension the inside the the PC case. To do this effectively, however, ASUS recommends that system builders use a processor fan that directs air downward into the motherboard. Unfortunately, like most processor fan/heatsink products made for the PC enthusiasts market, the Cooler Master Hyper 212 Plus is mounted vertically, directing air out the back of the case, not downward towards the motherboard’s components. In anticipation of the situation, ASUS provides a spot on the motherboard that allows one to mount a small 50mm “assistant” fan, in order to improve the air flow through the TUF Thermal Armor (See Figure 2).
After successfully assembling the components, and firing up the system without issue, I proceeded to update the P67 Sabertooth’s UEFI firmware to the latest version. Fortunately ASUS makes updating the firmware incredibly easy, offering a number of ways to perform the task, including directly from Windows. The one that worked best for me was to perform the update directly from within the UEFI. First, I inserted a USB drive contained the latest UEFI ROM file into a USB port. Then I entered the “Advanced Mode” of UEFI, navigated to the “Tool” menu, and selected “ASUS EZ Flash Utility.” I highlighted the USB drive containing the ROM file and selected “Enter” to proceed with the UEFI firmware update.
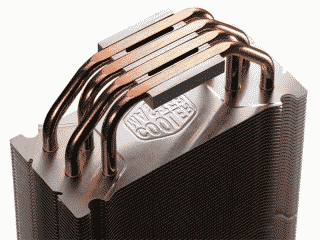
With updated UEFI firmware now place, it was time to explore the UEFI settings, ensuring that my drives were detected correctly, disabling unwanted features, etc. One issue I noticed fairly quickly was that my processor temperature was idling at ~42C at a room temperature of ~21C, a little hotter than what I would expect when using the Cooler Master Hyper 212 Plus. It should be noted here that on the P67 Sabertooth, the processor temperature reading in the UEFI can be anywhere between ~5C – ~10C higher than in Windows. That’s normal as the UEFI does not send idle commands to the processor, as is the case when the OS is running. Investigating this issue further led me to this Benchmark Reviews article discussing the best thermal paste application methods for heat-pipe direct touch coolers. After a bit of experimentation, I obtained the lowest processor temps using my Cooler Master Hyper 212 Plus by applying two thin lines of Artic Silver 5 thermal compound to the two center mounting base partitions (See Figure 3), lowering my processor temps to ~37C in UEFI and ~31 when measured from within Windows using Real Temp.
Windows Professional (x64) installed without issue on the OCZ Vertex 2 drive, but this is where my progress came to a temporary halt. One of the first applications I typically install shortly after I finish installing the OS is CPU-Z in order to evaluate processor core stepping and core voltage; internal and external processor clocks and clock multipliers; and memory frequency and timings. CPU-Z showed that the processor multiplier was “stuck” at 1.6 GHz (multipler = 16x), never allowing the processor to rise to its specified default operating frequency of 3.4 GHz (multiplier = 34x) or its default Turbo mode frequency of 3.8 GHz (multiplier = 38x). After trying numerous UEFI tweaks, I gave up and concluded that the board was defective. The replacement board was received a week or so later and after reassembling the requisite parts it worked as designed.
Another issue I encountered involved updating the firmware on the OCZ Vertex 80 GB drive to the most recent version – 1.33 at the time of this post. The OCZ Toolbox firmware update tool did not see the SSD drive because the tool is currently incompatible with the Intel Rapid Storage Technology (“RST”) driver software – V10.0.0.1046 at the time of this post. The work around for this problem was to remove the Intel RST driver, update the firmware, then reinstall the Intel RST driver. Incidentally, I took the opportunity to run a few benchmark tests against this drive using ATTO Disk Benchmark and came away with the 272 MB reads and 258 MB writes (128 KB transfer size).
With all of the device drivers installed Window’s Device Manager was still indicating that a driver for the “PCI Simple Communications Controller” was still missing (The dreaded yellow exclamation mark). It turned out that I needed to download and install Intel’s Management Engine Interface utility from ASUS in order to clear that error.
Finally, to improve the reliability of the P67 Sabertooth’s Wake on Lan feature, I decided to download and install the Intel drivers for the Sabertooth P67’s 82579V Ethernet network interface controller. Then, I entered the UEFI’s Advanced mode, navigated to Advanced -> APM and enabled “Power On By PCI.”
With these issues out of way I continued on, updating Windows, adding applications, tweaking options and generally letting the system burn-in for a bit. Then it was time to move on to overclocking the system.
The Overclock
With the advent of Intel’s “Turbo Mode” feature starting in its Nehalem “Bloomfield” processor, the Base Clock (BCLK) multiplier value was able to automatically increase beyond its default value if the processor was operating within what the design considered to be a safe temperature tolerance. For example, in the Bloomfield architecture, processors were allowed to raise the stock multiplier value by 1 or 2 depending on the number of cores being used so long as the processor’s core temperatures did not rise beyond an arbitrary threshold. Intel’s Lynnfield processors generally ran cooler and so were allowed to be considerably more aggressive with Turbo Mode, increasing Turbo Mode multipliers within a range of ~2-5. In practice what this meant was that when fewer processor cores were in demand by a given application or process, larger multiplier values were used, thus allowing the processor to temporarily run at a higher clock rate than the default multiplier would normally allow. In the case of my Core i7 860 for example, with its BCLK of 133 MHz, it was not uncommon to see it use a multiplier value of 26 in single-threaded applications, yielding a processor speed of 3.46 GHz, well above its stock speed of 2.8 GHz when using the default multiplier of 21.
Consequently, when it came to overclocking, the Lynnfield architecture offered the user somewhat of a choice. You could attempt to overclock the system with Turbo Mode enabled, requiring you to be mindful of the headroom necessary when higher turbo multiplier values kicked in, or you could simply disable Turbo Mode and go with the more traditional overclocking approach. Either way, the steps were similar: adjust the BCLK to achieve your desired processor frequency; adjust the memory multiplier to compensate for the change in BCLK; and, if necessary, adjust the processor voltage, memory voltage, and Uncore voltage to stabilize the system; rinse and repeat.
The new Sandy Bridge technology, however, is a bit more challenging when it comes to overclocking. The new 100 MHz BCLK of Sandy Bridge processors doesn’t give users a lot of latitude in terms of increasing its value. If you’re lucky you can get it to run reliably at say 110 MHz. Multiply that value with your maximum Turbo Mode multiplier value, 38 in the case of the Core i7 2600K, and you’ll achieve ~4.2 GHz. Fortunately, with the K series processor, your overclocking options aren’t limited by the BCLK value; you’re also offered an unlocked multiplier ranging from 34 to 57, allowing you to potentially reach much higher processor speeds when operating in Turbo Mode.
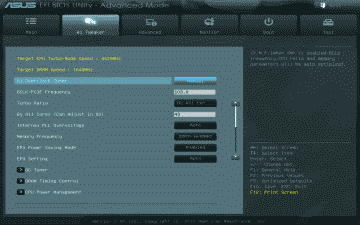
Not unlike most of the “enthusiasts” motherboards on the market today, the Sabertooth P67 offers a method to automatically overclock your system, dispensing with the need in most cases to independently adjust BCLK, memory and voltage settings. In fact, the Sabertooth P67 offers two methods: one is available by navigating to the in the UEFI’s “EZ Mode” settings and selecting the “Performance” option. The other is available by navigating to Advanced Mode -> Ai Tweaker and selecting “OC Tuner.” I decided to give the EZ Mode Performance option a go and was quite happy with the results (See Figure 4).
The BCLK was increased to 103 MHz and the Turbo Mode multiplier for all four cores to 43. This resulted in an overall processor speed of ~4.4 GHz when running in Turbo Mode. My DDR3-1600 memory settled at a speed of 1648 MHz. None of this is going to set any overclocking records, but you know what? It’s plenty fast for me for the time being, with plenty of headroom to make further increases at a later time if desired.
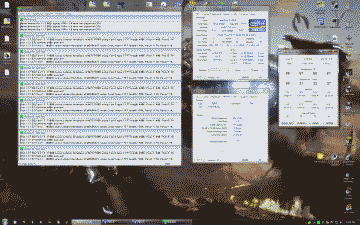
Next, I adjusted my memory timings to the 7-8-7-24 and ran Memtest86+ for a couple of passes to ensure those timings were stable. Then I ran the 64-bit version of Prime 95 using the “Large in-place FFT” setting for ~24 hours to ensure that the system stability and maximum processor core temperatures were kept in check. I should note that ambient room temperature during the Prime 95 testing was ~21 C. The tests resulted in no errors and the maximum processor core temperatures were ~65 C. (See Figure 5).
Conclusion
Intel’s Core i7 2600K processor and ASUS’s Sabertooth P67 motherboard turned out to be a good mid-range combination. Throw in the MSI R6950 Twin Frozr II graphics card and the 8 GB DDR3-1600 dual kit from G.Skill and I couldn’t be more pleased with the results of my first Sandy Bridge build. Since its completion, the system has been 100% stable. Future plans for this system likely include replacing the 80 GB SATA 2.0 drive with a SATA 3.0 drive, and of course do a bit more overclocking.
References
https://www.asus.com/us/Motherboards/SABERTOOTH_P67/


