bookmark_borderHow To Access Your VirtualBox Guest VM From The Host Using SSH

(20180430 — The steps in this post were amended to address changes in recent versions of software — iceflatline)

Recently I had the occasion to spin up a Ubuntu server Virtual Machine (“VM”) in VirtualBox on a Windows-based host machine. Those of you who have performed a similar excercise know that the default window size that VirtualBox provides to command-line-based VMs, like *BSD and Ubuntu server, etc., is rather small, somewhere in neighborhood of the standard VGA resolution of 640 x 480 pixels. Normally the fix for this, of course, would be to install what VirtualBox calls “Guest Additions,” which consists of device drivers and other applications that optimize the guest operating system for, among other things, the ability to enlarge the window size. However, getting Guest Additions to install and run properly on command-line-based guest VMs is a monumental pain in the ass. One work-around that seems to work fairly well is to switch the VM window to “scale mode” (View->Switch to Scale Mode or Host+C), resulting in what is essentially a magnified version of the window and its contents. An even better solution, in my opinion, is to configure the VM so that you can connect to it directly from the host machine using Secure Shell (“SSH”), giving you full control over the window and text size of the guest VM.

This post explains how to access a VirtualBox Ubuntu server guest VM from the VirtualBox host machine using SSH. It then goes on to explain how to accomplish the same task when using a FreeBSD guest VM. The software versions used in this post were as follows:

  • FreeBSD 11.0-RELEASE
  • Ubuntu Server 18.04 LTS
  • VirtualBox 5.2.6

Let’s get started…

First, let’s add a new “VirtualBox Host-Only Ethernet Adapter” in VirtualBox. This new adaptor will allow us to enable a private network consisting of our host machine and our guest VM. The host can connect to any guest VMs configured to use this adaptor, and they can connect to each other, but nothing outside of this virtual network will be permitted access.

Navigate to Files->Preferences->Network and click on the “+” icon to add new adaptor. You’ll see that VirtualBox creates a new adaptor called “VirtualBox Host-Only Ethernet Adapter #2” (See Figure 1).

Screenshot showing the creation of a VirtualBox Host-Only Ethernet Adapter in VirtualBox

Figure 1

Right now you might be thinking “but couldn’t I just use the existing default VirtualBox Host-Only Ethernet Adaptor?” You absolutely could; however, setting up a second one allows you to customize it to your liking, leaving the default adaptor in its default configuration as a fallback.

Now, double-click the new adaptor (or highlight it and select the edit icon) and note the IP address and subnet mask (e.g., 192.168.135.1 and 255.255.255.0) that VirtualBox has arbitrarily assigned under the “Adapter” tab. You may change these network parameters if desired, however, it is preferable to retain “1” as the value of the last octet in the IP address (See Figure 2).

Screenshot showing the IP address and subnet mask assignment in the VirtualBox Host-Only Ethernet Adapter #2

Figure 2

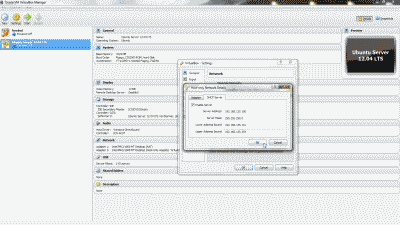
Optionally, you may configure a DHCP server on the VirtualBox Host-Only Ethernet Adapter #2 so that the guest VM obtains an IP address automatically at boot time. This can be accomplished by navigating to Files->Preferences->Network, double-clicking the new adaptor (or highlighting it and selecting the edit icon), selecting the “DHCP Server” tab and the selecting “Enable Server”. You’ll then need to modify the various DHCP server parameters (e.g., Server Address, Server Mask, etc.), keeping in mind that they should encompass the IP address configured for the adaptor, else the IP address should be modified so that it lies within the DHCP server parameters you’ve configured. When finished, select “OK” (See Figure 3). Note: I typically forgo using the DHCP server, electing instead to use a static IP address. That way, I can consistently use the same address each time I want use SSH to connect to the guest VM.

Screenshot showing the DHCP server configuration tab in the VirtualBox Host-Only Ethernet Adapter #2

Figure 3

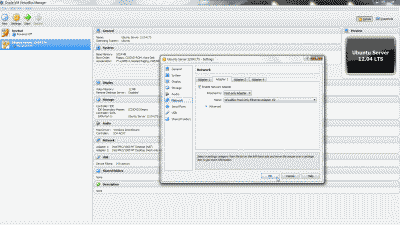
Let’s configure our Ubuntu server VM so that it will use the new VirtualBox Host-Only Ethernet Adapter #2. Shutdown the Ubuntu server VM if it’s running. Right-click on the VM and select Settings->Network. Select the “Adapter 2” tab, then select “Enable Network Adapter”. From among the options under “Attach to:”, select “Host-Only Adapter”, then select “VirtualBox Host-Only Ethernet Adapter #2” from among the options under “name:”. Now select “OK” (See Figure 4).

Screenshot showing the selection of VirtualBox Host-Only Ethernet Adapter #2 for use by the Ubuntu server virtual machine

Figure 4

Now start the Ubuntu server VM. After the system has fully booted, login to the VM at the VirtualBox console window and execute the command ifconfig -a to list all network devices. In addition to your primary network device, enp0s3 (in this example), you should now see a second network device listed, enp0s8 (in this example). If you chose to setup a DHCP server when creating VirtualBox Host-Only Ethernet Adapter #2, then enp0s8 should already have an IP address assigned to it from among the pool of addresses you chose to use with setting up the DHCP server, in which case you should make a note of this address and use it to connect to the Ubuntu server VM using SSH.

If you elected not to setup a DHCP server when creating VirtualBox Host-Only Ethernet Adapter #2, then you’ll need to assign a static IP address to network device enp0s8. First, install the package ifupdown:

Then open /etc/network/interfaces as the root user and add the following lines, making sure to change the values shown in this example so that they fall within the IP subnet parameters chosen when creating the new VirtualBox Host-Only Ethernet Adapter #2:

Now start the interface so that it obtains the new network parameters:

At this point you should be able to connect to the Ubuntu server VM via SSH using this static IP address.

FreeBSD Guest VM

A similar approach can be taken for a FreeBSD guest VM. The setup and configuration of the VirtualBox Host-Only Ethernet Adapter in VirtualBox is identical to what has been described thus far for the Ubuntu server VM. However, in order to assign a static IP address to the new network interface, em1 in the case of FreeBSD, you’ll need to open /etc/rc.conf as the root user and add the following line, making sure to change the values shown in this example so that they fall within the IP subnet parameters chosen when creating the new VirtualBox Host-Only Ethernet Adapter #2:

Then restart the interface so that it obtains the new network parameters:

Conclusion

The default window size that VirtualBox provides to command-line-based guest VMs like BSD and Ubuntu servers is typically very small, resulting in a poor user experience for those administrators trying to perform work beyond just a few quick simple commands. Fortunately, VirtualBox can be configured so that the user can connect directly to a guest VM from the host machine using SSH, giving the user full control over window and text sizing.
bookmark_borderCheck if a Device or File System is Mounted

Occasionally I find myself needing to mount a remote file system on a local *BSD or Linux machine. On one such occasion recently I had mounted an NFS file system from a Network Attached Storage (NAS) server to a local machine running FreeBSD, for the purpose of backing up some of the files to yet another machine offsite using the rsync utility. I had created a little script to run rsync periodically through cron. This script worked well until I noticed a few days later that the backups on the remote machine no longer existed. After some investigation I quickly determined that NAS file system was no longer mounted on the FreeBSD machine (I can neither confirm or deny that I may have configured something incorrectly). The rsync script, upon noticing that files no longer existed in the source, deleted said files at the target. It was at that point that I decided to include a small test in the rsync script to check on the existence of the mounted file system; then, if it still existed, the script would proceed with the rsync command, else it would write an error message to a log. Here is the code snippet I used in the script, which you can easily adapt for other situations:

The df command simply displays statistics about the amount of free disk space on the specified file system. If a file system argument is not specified, statistics for all mounted file systems are displayed. The output of the df command is then piped through the venerable grep utility using its -q option, which instructs grep not to write anything to standard output, but rather exit immediately with a zero status if a match is found. Finally, the file system we’re interested in matching to, parsed from the output of the df command, is provided to grep. If the output of this df command is zero, the script runs a command (in this case my rsync command), else if it exits with anything other than zero, the script runs another command instead (in this case an error message).

bookmark_borderHow to use Clonezilla to Create and Backup Disk Images to FreeNAS

FreeNAS is an open source storage platform based on FreeBSD that supports file sharing across Windows, Apple, and Unix/Linux systems. Clonezilla is an open source clone utility for doing bare-metal backup and recovery for disks and disk partitions.

In this post I will describe how to use Clonezilla to create image files of disks or disk partitions and backup those images in real time over a network to a machine running FreeNAS. All steps involved assume you have a running implementation of FreeNAS. The software versions used in this post were as follows:

  • Clonezilla v1.2.12-10
  • FreeNAS v0.7.1 Shere (revision 5127)

Configure FreeNAS

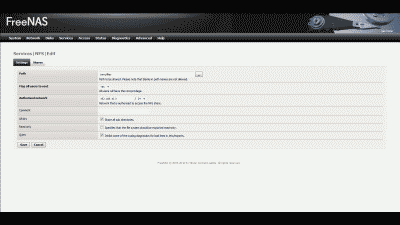
Let’s start by making a new directory in FreeNAS to hold the images we create using Clonezilla. For the purpose of example, let’s assume there is an existing mount point located at /mnt/files and create a new subdirectory called images at that location. Next, let’s enable Network File System (“NFS”) service in FreeNAS so that /mnt/files/images can be accessed from Clonezilla. Login into the FreeNAS web interface and navigate to Services -> NFS -> Settings and make sure that the check box for enabling NFS is checked then specify the number of servers that will run (Hint: the default value of four should easily handle dozens of users). Now select “Save and Restart.” Next, navigate to Services -> NFS -> Shares and select the “+” icon, where you are presented with the configuration screen for creating a new NFS share. Enter the path to be shared; the network that is authorized to access /mnt/files/images; and, make sure that the “All dirs” and “Quiet” check boxes are selected. The remaining options can remain at their defaults (See Figure 1). Then select “Add” then “Apply changes” (Note: If you would prefer to use Common Internet File System (“CIFS”) instead of NFS, navigate to Services -> CIFS/SMB and select the appropriate settings and add your network share).

Screenshot of NFS shared path configuration in FreeNAS

Figure 1

Using Clonezilla
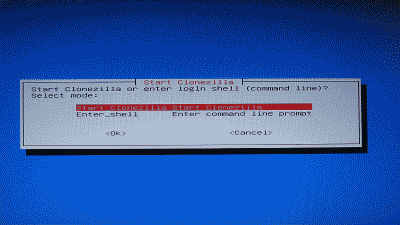
Now it’s time to use Clonezilla. Download a copy of Clonezilla live and burn it to a CD (or place it on a bootable USB drive). Boot the system using the Clonezilla live disk, where you’ll be given the option to change the language and select an alternative keyboard keymap, eventually arriving at the “Start Clonezilla” Screen (See Figure 2).

Screenshot of Clonezilla's start screen

Figure 2

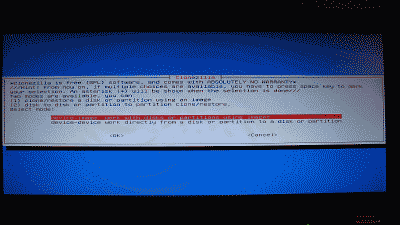
Highlight “Start Clonezilla” and select “Ok.” The screen that follows provides a choice of cloning/restoring a disk or disk partition using using an image, or cloning/restoring a disk or disk partition directly to another disk or disk partition. Since we’ll be creating an image of a disk, we should select “device-image work with disks or partitions using images” (See Figure 3).

Screenshot of Clonezilla menu option to work with with images or devices when cloning or restoring

Figure 3

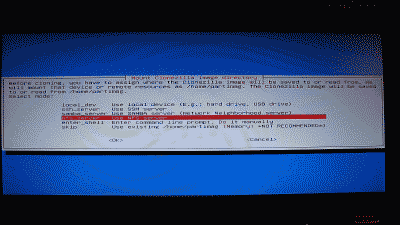
Next, Clonezilla will ask us to define where the image will be saved to (or read from), providing you with several options for accomplishing this task. We’re interested in using an NFS server, so select “nfs_server Use NFS server” (See Figure 4).

Screenshot of Clonezilla options specifying where it should transfer images to/from

Figure 4

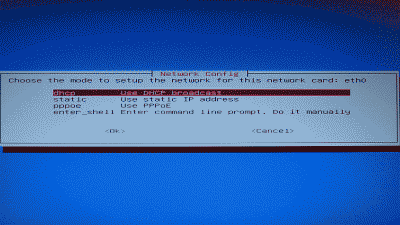
You’ll then be offered several choices on how Clonezilla should obtain IP network settings, including DHCP, static IP, PPPoE, or a shell prompt to manually define how it should go about doing obtain its settings. Select which option works best for you then select “Ok” (See Figure 5).

Screenshot of Clonezilla IP network configuration options

Figure 5

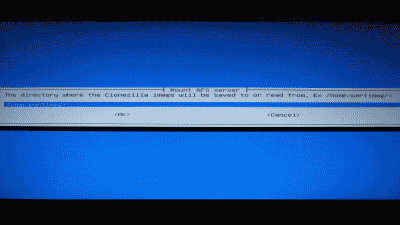
Clonezilla will then ask you whether it should use NFS version 2,3 or 4. Select “nfs NFS V2, V3,” then enter the IP address or the host name of your FreeNAS machine in the screen that follows. Next, you’re asked where the Clonezilla image will be saved to/read from. For the purpose of our example, we’ll enter “/mnt/files/images” to match the new directory we created earlier (See Figure 6).

Screenshot of Clonezilla option specifying where the image should be stored

Figure 6

Clonezilla will then mount /mnt/files/images and display its current disk usage. Select “Enter” to continue and you’ll be given a choice to use Clonezilla in either a beginner or expert mode. Select “Beginner mode: Accept the default options” and you’ll be presented with a choice of whether to create images of the entire disk and/or one or more partitions (Note: this screen is also where you would choose to restore disk or partition images). If you would prefer to create an image of a partition, select “saveparts Save_local_partitions_as_an_image” where you will be presented with a choice of which partition(s) to create images of. For the purpose our example, however, we’ll select “savedisk Save_local_disk_as_an_image” to create an image of the entire disk (See Figure 7).

Screenshot of Clonezilla options allowing user to specify whether to create or restore the images of disks or disk partitions

Figure 7

Next, we’ll enter a name for new image and then chose whether we want to check and repair the file system before Clonezilla creates the image. This option is only for supported for certain Linux files systems, like ext3/4, and not for NTFS, so unless you have one of the supported file systems and have reason to suspect the file system may be in error, you should simply select “Skip checking/repairing source file system.” Clonezilla will then ask if you’d like for it to check if the image it creates will be restorable. Don’t worry, it performs this test without actually writing any data to the drive, so let’s select “Yes, check the saved image.” Now select “Enter” to continue, and confirm that you’d like Clonezilla to create the image by entering “y” at the prompt. Clonezilla will then create the disk image and write it to /mnt/files/images on your FreeNAS machine. When complete, Clonezilla will test to make sure the image is indeed restorable and then give the option of powering off the machine, rebooting, using the command line or start over. Congratulations! You’ve just created an image of your disk and stored it on your FreeNAS machine, where it will live safely and happily until you need it.

bookmark_bordercron Howto

(20170327 — The steps in this post were amended to address changes in recent versions of software — iceflatline)

cron is a time-based job scheduler in BSD, Linux and other Unix-like operating systems. It is commonly used to schedule system maintenance or administrative tasks, however it can also be used by system users to schedule their own tasks.

Tasks scheduled to run from cron are typically referred to as “cron jobs.” A “crontab” (cron table) is a configuration file which contains one or more “cron job” entries (i.e., commands and/or scripts to be run at specified dates and/or times.

This post will discuss the use of cron in FreeBSD and Ubuntu server, including the location of cron-related files. The software versions used in this post were as follows:

  • FreeBSD 11.0 RELEASE
  • Ubuntu 16.04.2 LTS

Using cron

There are several different ways to use cron. In the /etc directory in many Linux distributions, for example, you’ll likely find some sub-directories called cron.hourly, cron.daily, cron.weekly, and cron.monthly. If you place a command into one of those directories it will be run hourly, daily, weekly or monthly, respectively. If you require more granularity, you can add cron job entires directly to the system-wide crontab file /etc/crontab. Editing this file directly however is usually discourage as it can be overwritten when the system is upgraded.

A second type of system-wide crontab can often be found in /etc/cron.d/. Within this directory are small named crontabs. The directory is often used by packages, however system users can also place a file here containing cron jobs. The file must share the same name as the user so that the system knows which user is to be associated with the commands contained within it.

Perhaps a better solution though is to create your own crontab. User crontabs allow individual users to schedule tasks without the need for root privileges. Each user can have their own crontab, and cron jobs in a users’ crontab run with the permissions of the user who creates the crontab. Although the system-wide crontab /etc/crontab is usually associated with root, the root user can also have an independent crontab just like any other user. When created, user crontab files are saved in various locations under /var. These files are not intended to be edited directly, however, but rather by using the crontab command. Here’s the crontab command’s basic syntax:

-u – Specifies the name of the user whose crontab is to be created or edited. If this option is not given, crontab examines “your” crontab; i.e., the crontab of the person executing the crontab command.

-l – Displays the contents of the crontab file.

-r – Removes the current crontab file.

-e – Creates a new crontab file (or edits an exiting one) using the users default command line editor specified in the environment variables. After you successfully save and exit from the editor, the modified crontab file will be installed automatically. Note that if you are running the crontab -e command inside of su you will create or edit the crontab file of the root user. Likewise if you use the command sudo crontab -e.

Each line in a crontab file contains seven fields from left to right:

Minute – Any integer from 0 to 59.

Hour – Any integer from 0 to 23.

Day – Any integer from 1 to 31 (must be a valid day if a month is specified).

Month – Any integer from 1 to 12, or the abbreviated form of the month; e.g., jan, feb, etc.

Day of week – Any integer from 0 to 7, where 0 or 7 represents Sunday, or the abbreviated name of the week; e.g, sun, mon, etc.

User – Specifies the user under which the cron jobs are run

Command – the command to execute (the command can either be a command or the name of a script containing one or more commands)

There are also several ways of specifying multiple values in a field:

  • Using a comma specifies a list of values, for example: 1,3,4,7,8. Using a hyphen specifies a range of values, for example: 1-6, which is equivalent to 1,2,3,4,5,6.
  • Using an asterisk specifies all possible values for a field; e.g., every hour or every day.
  • The forward slash can be used to skip a given number of values. For example, “*”/3 in the hour field is equivalent to the hours 0,3,6,9,12,15,18,21. The “*” specifies “every hour” but the “/3” means that only the first, fourth, seventh,…etc hours starting at midnight are used.

Here’s some example cron job entries using the rsync command. As you can see, you could add one or many cron job entries to your crontab depending on your needs:

cron will email to the user all output of the commands it runs. To silence this, the output can be redirected to a log file or to /dev/null. Note also that individual users’ crontab files (i.e., those edited via crontab -e, sudo crontab -e or under su for root’s), omit the user field since the system understands that crontab file belongs to the user. The /etc/crontab and the files in /etc/cron.d and /etc/cron.{hourly, daily, weekly, monthly}, however, do require a field for the user.

cron in FreeBSD

  • cron daemon: /usr/sbin/cron
  • cron start script: /etc/rc.d/cron
  • crontab command: /usr/bin/crontab
  • System-wide crontab files: /etc/crontab
  • crontab file location created using crontab -e (The crontab file name = the user name): /var/cron/tabs/
  • Log location: /var/log/cron

cron in Ubuntu server

  • cron daemon: /usr/sbin/cron
  • cron start script: /etc/init.d/cron
  • crontab binary: /usr/bin/crontab
  • System-wide crontab files: /etc/crontab and /etc/cron.d
  • Other crontab locations: /etc/cron.{hourly, daily, weekly, monthly}
  • crontab file location created using crontab -e (The crontab file name = the user name): /var/spool/cron/crontabs/
  • Log location /var/log/syslog

Conclusion

Um… cron… ’nuff said.

References

http://ss64.com/bash/cron.html

http://www.freebsd.org/doc/handbook/configtuning-cron.html

http://www.marksanborn.net/linux/learning-cron-by-example/

https://help.ubuntu.com/community/CronHowto

bookmark_borderUsing xargs

Recently I decided to update and re-tag my music collection, which had suffered at the hands of the untrained and uncaring for far too long. The album art in particular, comprised of various jpg files and scattered throughout the numerous artist and album directories, was incomplete and/or inaccurate. I decided I needed a way to quickly and efficiently remove this old album art before starting the re-tagging process. Enter xargs, a handy little utility in Linux and Unix operating systems used to construct a list of arguments for an arbitrary Linux or Unix command. xargs is a good companion for commands like find, locate and grep that output long lists of files. The general syntax for the xargs command is as follows:

Let’s take the case of the my superfluous jpg files to see how xargs might be used in practice. We’ll start by opening a terminal and using the find command to locate these jpg files. This following command should find files ending with “.jpg” anywhere within my music directory, including sub-directories, and list them to the terminal:

By the way, in this particular example I’m passing along a directory to the find command that I know in advance I have the appropriate permissions to access, in this case my home directory. However, depending on what you’re searching for and where, the find command may return “Permission denied” because it (or rather you) lack sufficient permissions to access certain directories and files. In those cases you’ll need to preface the find command with su or perhaps sudo in order to avoid these errors.

Also be aware that the locate command offers similar capabilities to find, but instead of searching through the system’s directories and files, locate searches through a pre-built database of these directories and files. locate can produce significantly faster results using less computing resource compared to find, but requires the database to be updated regularly or else the results will be inaccurate and/or incomplete. Here’s an example of how to find our jpg files using the locate command:

Okay, let’s combine the find command we used before with xargs to quickly remove the jpg files:

In this example, the find command searches through my ~/music directory and pipes to xargs a list any files ending in “.jpg”. The xargs command then splits this list into sub-lists and calls the rm command once for every sub-list. The -print0 option in the find command prints the full file name on the standard output followed by a null character. This allows file names that contain newlines or other types of white space to be correctly interpreted xargs when it uses it’s corresponding -0 option. Using xargs is more efficient than this functionally equivalent version of the find command, which must call rm once for every single file it finds:

Want to copy these jpg files to another directory instead removing them? The following two examples demonstrate how xargs can be used to accomplish that:

In the second example, the -I option tells xargs to replace the string {} with the argument list from the find command, in this case our list of jpg files. Note that not all versions of xargs support the {} syntax. No worries though, in those cases you can specify any string you’d like after -I; for example, the following variation replaces the string {} with x and will work just as well:

Here’s another use for xargs – systematically setting permissions for a large number of directories or files. When assigning reasonably secure permissions directories and files it’s common to give directories a permission of 755 and files a permission of 644. Since the command we’d normally use in this situation – chmod [some permission] -R /path/to/some_directory – will assign the same permission level to the directory and the files, let’s use xargs to assign permissions selectively:

Using this approach, for example, we could set all the mp3 files in ~/music to read-only so that an application or script doesn’t accidentally overwrite their tag metadata:

To verify that the permissions were set correctly let’s pass ls -l to xargs:

There ya have it. A couple of examples of how to use the xargs utility, one of the most useful and the most underappreciated utilities in *nix toolbox.

iceflatline